Project Hikari Development Blog

2D Sprite Animation: Part 2

| Comments

In this post I’m going to talk about how I grouped animations together in the game. If you haven’t read my first post about animations I recommend doing so before continuing.
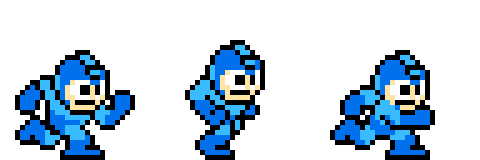
Typically a character will have many animations, so it would be nice to package related animations together in a set. Besides organization, there’s another advantage to grouping animations; if, for example, several characters have similar actions (e.g.: idle, walking, jumping, taking damage, etc.), then is may even be possible to “swap” animation sets and the “correct” animation will automagically play if your logic is sufficiently decoupled from your animation names.

I won’t go too much more into that as it could probably be a post of its own.

Animation Sets

An animation set is not much more than a map of Animation instances and a string that can be used to identify the image/texture to use when drawing them.

(AnimationSet.hpp) download
1
2
3
4
5
6
7
8
9
10
11
12
13
14
15
16
17
18
19
20
21
22
23
24
25
26
27
#include "Animation.hpp"
#include <memory>
#include <string>
#include <unordered_map>
#include <utility>

typedef std::shared_ptr<Animation> AnimationPtr;

class AnimationSet {
private:
    std::string name;
    std::string imageFileName;
    std::unordered_map<std::string, AnimationPtr> animationMap;

public:
    static const AnimationPtr NULL_ANIMATION;

    AnimationSet(const std::string& name, const std::string& imageFileName);

    const std::string& getName() const;
    const std::string& getImageFileName() const;

    bool add(const std::string& name, const AnimationPtr& animation);
    bool has(const std::string& name) const;
    bool remove(const std::string& name);
    const AnimationPtr& get(const std::string& name);
};

Pretty straightforward. The implementation is just about as simple.

(AnimationSet.cpp) download
1
2
3
4
5
6
7
8
9
10
11
12
13
14
15
16
17
18
19
20
21
22
23
24
25
26
27
28
29
30
31
32
33
34
35
36
37
38
39
40
41
42
43
44
45
46
47
#include "AnimationSet.hpp"

const AnimationPtr AnimationSet::NULL_ANIMATION = AnimationPtr();

AnimationSet::AnimationSet(const std::string& name, const std::string& imageFileName)
    : name(name)
    , imageFileName(imageFileName) {

}

const std::string& AnimationSet::getName() const {
    return name;
}

const std::string& AnimationSet::getImageFileName() const {
    return imageFileName;
}

bool AnimationSet::add(const std::string& name, const AnimationPtr& animation) {
    if(has(name)) {
        return false;
    }

    animationMap.insert(
        std::make_pair(name, animation)
    );

    return true;
}

bool AnimationSet::has(const std::string& name) const {
    return animationMap.find(name) != animationMap.end();
}

bool AnimationSet::remove(const std::string& name) {
    animationMap.erase(name);

    return true;
}

const AnimationPtr& AnimationSet::get(const std::string& name) {
    if(has(name)) {
        return animationMap.find(name)->second;
    }

    return NULL_ANIMATION;
}

Some error handling is omitted for brevity.

Now, defining a set of animations in JSON is dead easy — just create each animation as a key/value pair in an object. That object is your animation set. Here’s an example of an animation set for the “Octoput Battery” enemy found in several Mega Man titles. It has three animations: Idle, Walking, and Stopping.

(OctopusBattery.json) download
1
2
3
4
5
6
7
8
9
10
11
12
13
14
15
16
17
18
19
20
21
22
23
24
25
26
27
28
29
30
31
32
33
34
35
36
37
38
39
40
41
42
43
44
45
46
47
48
49
50
51
52
53
54
55
56
57
58
59
60
61
62
63
64
65
66
67
68
69
70
71
72
{
    "name": "Octopus Battery",
    "image": "assets/images/enemies/octopus-battery.png",
    "animations": {
        "idle": {
            "repeat": true,
            "keyframe": 0,
            "syncGroup": 0,
            "frames": [
                {
                    "x" : 0,
                    "y" : 0,
                    "width" : 16,
                    "height" : 16,
                    "hotspotX" : 8,
                    "hotspotY" : 8,
                    "length" : 1.0
                }
            ]
        },
        "walking": {
            "repeat": true,
            "keyframe": 1,
            "syncGroup": 1,
            "frames": [
                {
                    "x" : 16,
                    "y" : 0,
                    "width" : 16,
                    "height" : 16,
                    "hotspotX" : 8,
                    "hotspotY" : 8,
                    "length" : 0.15
                },
                {
                    "x" : 32,
                    "y" : 0,
                    "width" : 16,
                    "height" : 16,
                    "hotspotX" : 8,
                    "hotspotY" : 8,
                    "length" : 0.01666
                }
            ]
        },
        "stopping": {
            "repeat": true,
            "keyframe": 1,
            "syncGroup": 2,
            "frames": [
                {
                    "x" : 16,
                    "y" : 0,
                    "width" : 16,
                    "height" : 16,
                    "hotspotX" : 8,
                    "hotspotY" : 8,
                    "length" : 0.15
                },
                {
                    "x" : 0,
                    "y" : 0,
                    "width" : 16,
                    "height" : 16,
                    "hotspotX" : 8,
                    "hotspotY" : 8,
                    "length" : 0.01666
                }
            ]
        }
    }
}

What’s next?

Next installment we’ll talk how to apply an animation to an instance of SFML’s sf::Sprite class and how animation playback works in Hikari.

Comments